
(UnityScript) Custom Shader GUI
- Nobody
- 2020년 10월 21일
- 3분 분량

최종 수정일: 2022년 12월 25일

(StandardShaderGUI.cs)
유니티 엔진 내부의 빌트 인(Built-in) 셰이더인 'Standard' 의 'StandardShaderGUI.cs'를 참고해서 작성했습니다.
(Built-in Shader)
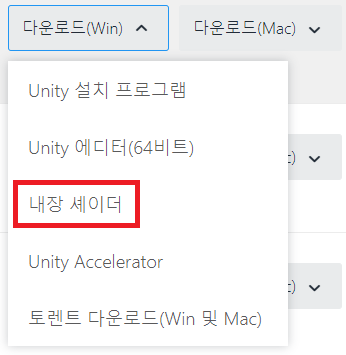
유니티 다운로드 아카이브(https://unity3d.com/kr/get-unity/download/archive)에서 내장 셰이더를 다운로드 받을 수 있습니다. 정말 간단한 기능으로 목표 설정을 해봅시다.
(Example Shader)
위와 같이 체크박스가 켜져 있을 때 숨어있던 프로퍼티들이 튀어 나오도록 할 것입니다. 그러기 위해선 먼저 다음과 같은 준비물이 필요합니다.

(CustomShaderGUI)
이름이 "Editor"인 폴더 하나, 메테리얼과 스크립트 파일 그리고 셰이더 파일입니다. 경로는 상관 없으나 폴더 이름이 매우 중요합니다.
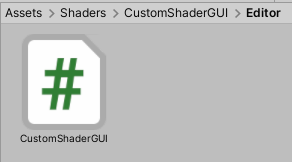
(Editor)
"Editor"와 똑같은 이름을 가진 폴더 안에서 자동으로 지정된 스크립트 파일을 찾기 때문입니다. 그리고 Editor 폴더 내에 있는 유니티 에디터 관련 스크립트들은 빌드시 포함되지 않습니다.
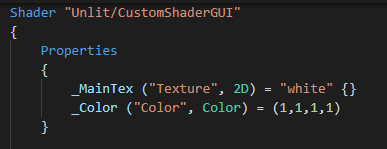
다음은 셰이더 코드입니다.
Shader "Unlit/CustomShaderGUI"
{
 Properties
    {
 _MainTex ("Texture", 2D) = "white" {}
 _Color ("Color", Color) = (1,1,1,1)
    }
 SubShader
    {
 Tags { "RenderType"="Opaque" }
 LOD 100

 Pass
        {
 CGPROGRAM
            #pragma vertex vert
            #pragma fragment frag

            #include "UnityCG.cginc"

 struct appdata
            {
 float4 vertex : POSITION;
 float2 uv : TEXCOORD0;
            };

 struct v2f
            {
 float2 uv : TEXCOORD0;
 float4 vertex : SV_POSITION;
            };

 sampler2D _MainTex;
 float4 _MainTex_ST;
 float4 _Color;

            v2f vert (appdata v)
            {
                v2f o;
                o.vertex = UnityObjectToClipPos(v.vertex);
                o.uv = TRANSFORM_TEX(v.uv, _MainTex);
 return o;
            }

 fixed4 frag (v2f i) : SV_Target
            {
 fixed4 col = tex2D(_MainTex, i.uv) * _Color;
 return col;
            }
 ENDCG
        }
    }
 CustomEditor "CustomShaderGUI"
}
CustomEditor "CustomShaderGUI"
셰이더 파일과 스크립트를 연결하는 부분입니다. 이름이 "CustomShaderGUI"와 똑같은 스크립트 파일에서 구성한 GUI로 셰이더 인터페이스를 대체하겠다는 뜻입니다. 프로퍼티와 서브셰이더 바깥에 선언해줘야 합니다.
이제 스크립트 파일을 작성해봅시다.
(스크립트를 적용하면 이렇게 됩니다)
using System;
using UnityEngine;
using UnityEditor;

public class CustomShaderGUI : ShaderGUI
{
 private static class Styles
    {
 public static GUIContent MainTexText = EditorGUIUtility.TrTextContent("메인 텍스쳐", "RGBA");
 //public static string MainTexText = "메인 텍스쳐";
    }

 MaterialProperty MainTex = null;
 MaterialProperty Color = null;

 MaterialEditor m_MaterialEditor;

 public void FindProperties(MaterialProperty[] props)
    {
 MainTex = FindProperty("_MainTex", props);
 Color = FindProperty("_Color", props);
    }

 public override void OnGUI(MaterialEditor materialEditor, MaterialProperty[] props)
    {
 FindProperties(props);

 m_MaterialEditor = materialEditor;
 Material material = materialEditor.target as Material;

 ShaderPropertiesGUI(material);
    }

 public void ShaderPropertiesGUI(Material material)
    {
 EditorGUIUtility.labelWidth = 0f;

 //Detect any changes to the material Check
 EditorGUI.BeginChangeCheck();
        {
 EditorGUILayout.Space(10);
 DoMainTexArea(material);
        }
    }

 void DoMainTexArea(Material material)
    {
 m_MaterialEditor.TexturePropertySingleLine(Styles.MainTexText, MainTex, Color);
 EditorGUILayout.Space(10);
    }

}
일단 다 지워주고 이렇게 씁시다. using UnityEditor; 는 스크립트의 외부, 즉 유니티에 미리 작성되어 있는 '유니티 에디터' 스크립트를 사용하겠다는 뜻입니다.
public class CustomShaderGUI : ShaderGUI
다른 이름을 써도 상관없지만, 클래스 이름이 항상 실제 스크립트 이름과 반드시 일치해야 합니다. 그리고 : ShaderGUI라고 써줘야 상속을 받아서 스크립트에서 인터페이스를 작성할 수 있습니다.
다음은 CustomShaderGUI 클래스 내부의 클래스들을 하나하나 살펴봅시다.
 private static class Styles
    {
 public static GUIContent MainTexText = EditorGUIUtility.TrTextContent("메인 텍스쳐", "RGBA");
 //public static string MainTexText = "메인 텍스쳐";
    }
(커스텀 셰이더 GUI로 드디어 프로퍼티에 한글을 넣을 수 있습니다)
using UnityEditor;로 'UnityEditor'에 이미 작성되어 있는 TrTextContent() 함수를 사용하면 프로퍼티에 들어갈 문장과, 마우스를 프로퍼티 위에 올렸을(over) 때 표시할 주석을 추가할 수 있습니다.
이런 프로퍼티 전용 텍스트를 private static class 'Styles'라는 클래스에 넣어두고 원할때 마다 호출해서 사용할 것입니다.
MaterialProperty MainTex = null;
MaterialProperty Color = null;

MaterialEditor m_MaterialEditor;
다음은 바깥에 MaterialProperty로 셰이더 파일의 메인 텍스쳐와 컬러가 들어갈 변수를 지정해주고, MaterialEditor를 선언해줍니다.
public void FindProperties(MaterialProperty[] props)
    {
 MainTex = FindProperty("_MainTex", props);
 Color = FindProperty("_Color", props);
    }
다음은 FindProperties라는 커스텀 함수를 작성합시다. 이 함수의 기능은 MaterialProperty로 선언된 변수들 중에 이름이 MainTex와 똑같은 것을 찾아냅니다.
MainTex = Findproperty("_MainTex", props)는 변수 MainTex 를 이름이 "_MainTex"인 셰이더 프로퍼티와 연결합니다.
public override void OnGUI(MaterialEditor materialEditor, MaterialProperty[] props)
    {
 FindProperties(props);

 m_MaterialEditor = materialEditor;
 Material material = materialEditor.target as Material;

 ShaderPropertiesGUI(material);
    }
그리고 OnGUI 함수입니다. 저희가 작성할 UI를 그려주는 함수입니다.
이전에 작성한 FindProperties(props); 로 셰이더 프로퍼티를 스크립트 속 변수들과 연결하고,
m_MaterialEditor = materialEditor;
Material material = materialEditor.target as Material;
m_MaterialEditor를 담당 메테리얼 에디터로 지정합니다. 그리고 셰이더가 적용된 메테리얼을 지정합니다.
ShaderPropertiesGUI(material);
ShaderProperties라는 함수를 따로 작성해서 GUI를 구성할 것입니다.
public void ShaderPropertiesGUI(Material material)
    {
 EditorGUIUtility.labelWidth = 0f;

 //Detect any changes to the material Check
 EditorGUI.BeginChangeCheck();
        {
 EditorGUILayout.Space(10);
 DoMainTexArea(material);
        }
    }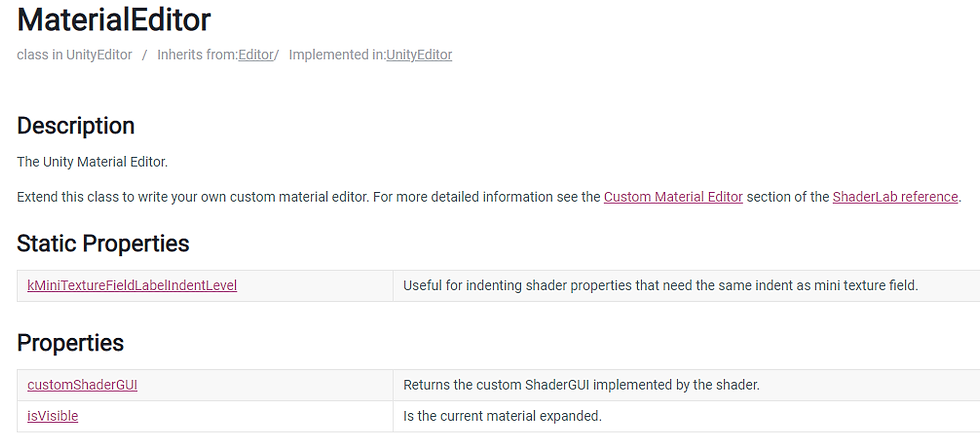
실제로 여러 프로퍼티를 배치하고 구성하고 디자인하는 부분입니다. 여기서 쓰이는 함수들은 전부 위 링크인 유니티 메뉴얼에 수록되어 있습니다. 이번 포스트를 끝내신 다음 원하는 기능이 있는 함수를 가져다 쓰시면 됩니다.
EditorGUI.BeginChangeCheck();
사용자가 인터페이스를 통해 직접 변수를 변경하거나 다른 스크립트에서 메테리얼을 건드려서 변화가 발생하는 경우를 감지하여 항상 업데이트 되게 합니다.
EditorGUILayout.Space(10);
레이아웃 함수, Space라는 이름 대로 괄호 내의 숫자 만큼 '행간'을 만들어줍니다.
DoMainTexArea(material);
그리고 특정 프로퍼티를 하나의 함수 단위로 만들면 관리하기 좋습니다. 인터페이스에 넣고 빼기 쉽도록 말이죠. 아래처럼 작성할 것입니다.
void DoMainTexArea(Material material)
    {
 m_MaterialEditor.TexturePropertySingleLine(Styles.MainTexText, MainTex, Color);
 EditorGUILayout.Space(10);
    }
TexturePropertySingleLine

텍스쳐가 들어가는 부분 하나와 최대 두개의 추가 프로퍼티를 작은 크기의 인터페이스 한 줄로 압축해서 만들어 줍니다. 스탠다드 셰이더의 알베도(Albedo) 부분 프로퍼티와 똑같습니다. 이제 작성이 끝났으니 결과를 봅시다.
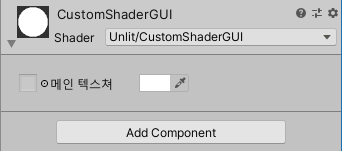
제대로 나옵니다. 이제 토글 기능을 달아봅시다.

[Hideininspector] [Toggle] _ToggleMenu("접었다~", float) = 0
셰이더에서 토글 체크박스를 하나 만들어줍시다. 변수는 따로 안 만들어도 됩니다. 스크립트에서 작성한 GUI로 덮어 씌울 것이니 주석으로 "접었다~" 써놔도 의미 없어요. 스크립트 내부에서 다른 텍스트로 대체됩니다.
private static class Styles
    {
 public static GUIContent MainTexText = EditorGUIUtility.TrTextContent("메인 텍스쳐", "RGBA");

 public static string ToggleMenuOFFText = "접었다~";
 public static string ToggleMenuONText = "폈다!";

    }
Styles 클래스 내부에 스트링(string) 변수로 원하는 텍스트를 만들어줍니다.
MaterialProperty ToggleMenu = null;토글을 인식할 변수도 만들어줍시다.
public void FindProperties(MaterialProperty[] props)
    {
 MainTex = FindProperty("_MainTex", props);
 Color = FindProperty("_Color", props);

 ToggleMenu = FindProperty("_ToggleMenu", props);
    }
ToggleMenu = FindProperty("_ToggleMenu", props);
이렇게만 써주면 어떤 종류의 프로퍼티든 간에 알아서 연결 됩니다. 쉽죠? 다음이 중요합니다.
void DoMainTexArea(Material material)
    {
 m_MaterialEditor.ShaderProperty(ToggleMenu, Styles.ToggleMenuOFFText);

 if (material.GetInt("_ToggleMenu") == 1)
            {
 GUILayout.Label(Styles.ToggleMenuONText, EditorStyles.boldLabel);
 EditorGUILayout.Space(10);
 m_MaterialEditor.TexturePropertySingleLine(Styles.MainTexText, MainTex, Color);
 EditorGUILayout.Space(10);
            }
    }
저희는 if문으로 토글 체크박스가 켜져있는지 꺼져있는지 인식 할 것입니다.
material.GetInt("_ToggleMenu") == 1
GetInt 함수로 _ToggleMenu의 값이 1이면 켜져있는 것이니 if문 내부의 내용을 출력합니다.
GUILayout.Label(Styles.ToggleMenuONText, EditorStyles.boldLabel);
Label 함수로 아까 만들었던 스트링 텍스트를 출력할 수 있습니다. 저는 볼드체를 골랐습니다.
(접었다~ 폈다!)
완성입니다.


댓글